

MongoDB Atlas is a fully-managed cloud-based database service developed by MongoDB, Inc. It provides all the features of the popular MongoDB database without the operational heavy lifting. If you’re considering migrating your app to use MongoDB Atlas or starting a new project, this guide will walk you through the setup process.
Why MongoDB Atlas?
Benefits include:
- Scalability: Automatic horizontal scaling with ease.
- Backups: Automated backups with restore functionality.
- Security: Built-in security features, such as IP whitelisting, encryption, and VPC peering.
- Monitoring & Alerts: Real-time performance insights.
- Global Clusters: Deploy and run your clusters in more than 70 regions across AWS, Google Cloud, and Azure.
This article will guide you to setup a MongoDB Atlas account and and create your first database and collection. This article will assume that you don’t have any account created with MongoDB atlas till now and is starting afresh
Step -1 Register
You can signup for an account in MongoDB Atlas in two ways. In order to do that first go the following link
Register for an Account in MongoDB Atlas
You should see a screen like this

In this screen you can enter the details as needed by the form or choose to sign up with Google. You can choose to go with any of then. The first procedure of signing up by entering you email address will require an extra step of verifying your email while the next one Signup with Google won’t require that.
Step-2 Fill in a small survey
After you register in either of the ways Atlas will ask you couple of questions to in order to understand your specific needs so that it can configure some settings behind the scenes. The next screen will look something like the below image
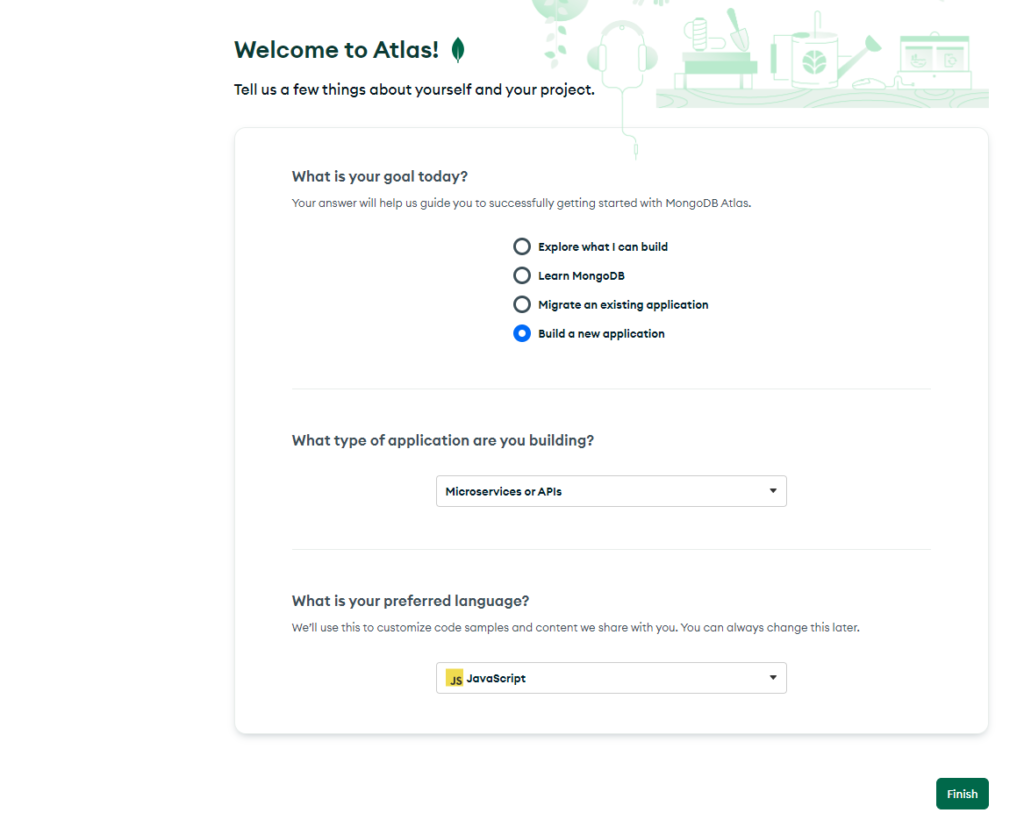
Here we have put in the goal as “Build a new application” and Type of Application as “Microservice or API” and finally the language as “JavaScript”. You can choose different option as per your needs
Step-3 Create Cluster
In this step Atlas will ask you to choose the cluster type and some relevant questions in order to build the cluster. As we are doing it for our learning purpose it is better to use free M0 to start with and obviously you can choose the plans according to your needs. Checkout the below image for more details
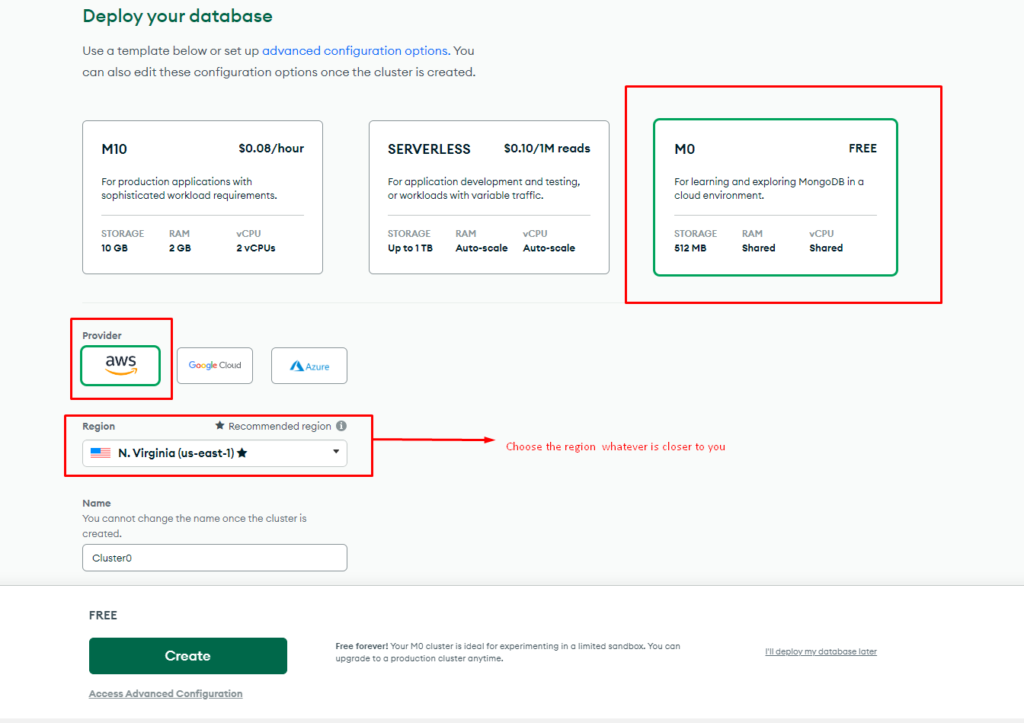
You can choose any cloud platform you want doesn’t matter. But it is absolutely recommended to use the Region nearest to your physical location or better to say web servers physical location so that data serves faster.
Step-4 – Create Database User
Once you are done creating the cluster , Atlas will ask you to create a database user . The screen will look something like the following
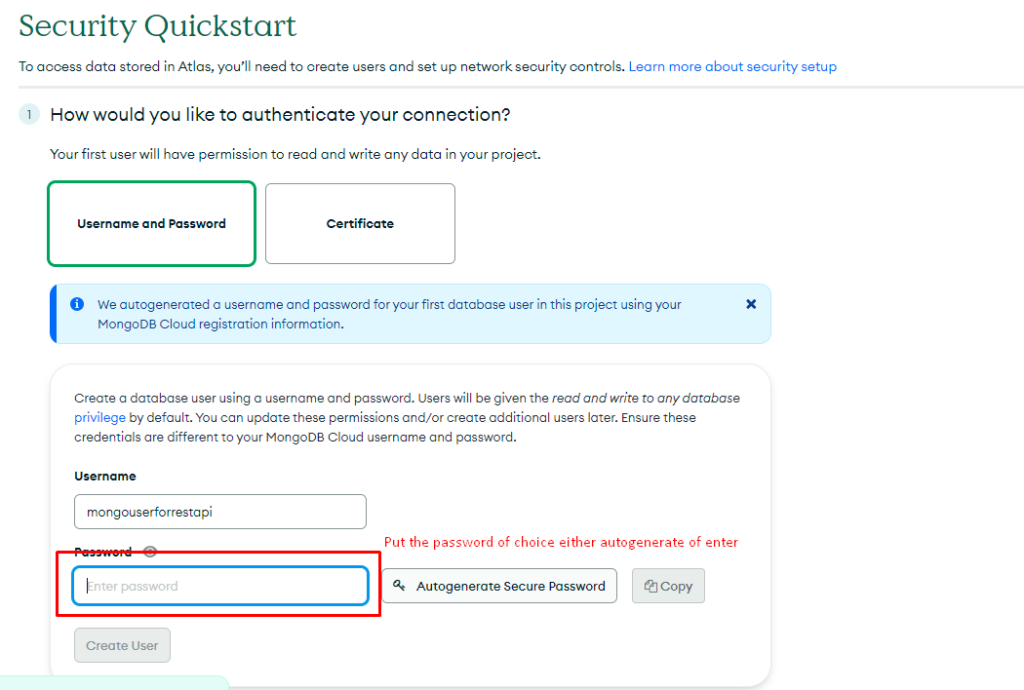
Always use ‘Autogenerate Secure Password’ feature but in case you want to put the password manually , please do remember that the password should not contain any special characters.
Step-5 Create Network Access
In this screen Atlas is going to configure network access or the IP Address from where our database can be accessed. Always try to use your machine’s IP Address or Server’s IP Address from where your code is going to access the data. Please look into the below picture for more clarity.
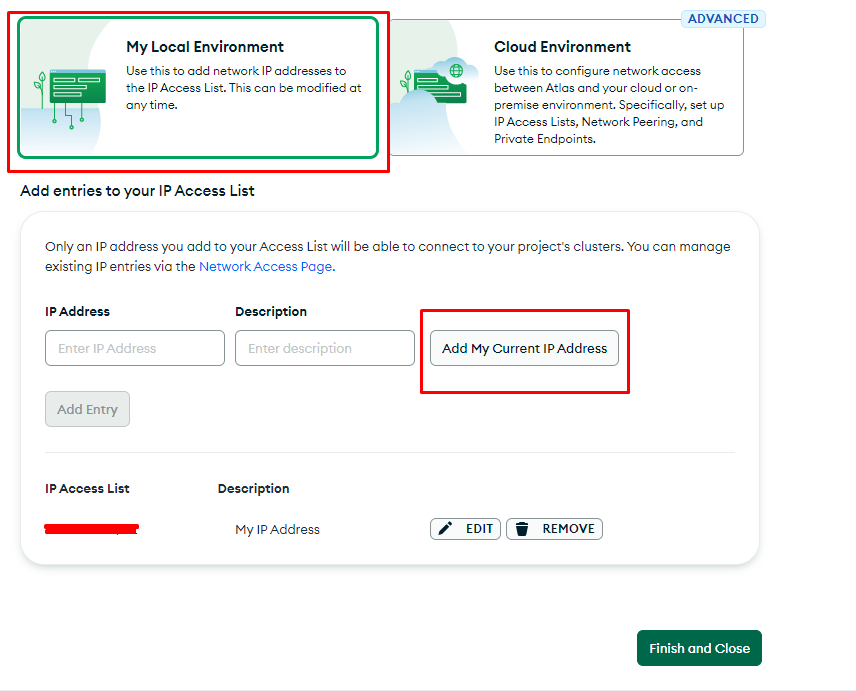
In case you want to use the database from different IP addresses or from anywhere you can configure that from the Network access tab on the left hand side in the dashbaord
Step-6 Connect with Cluster/Database
In this step we are going to connect the database.

Once you click on the connect button it will popup a Modal like the following image
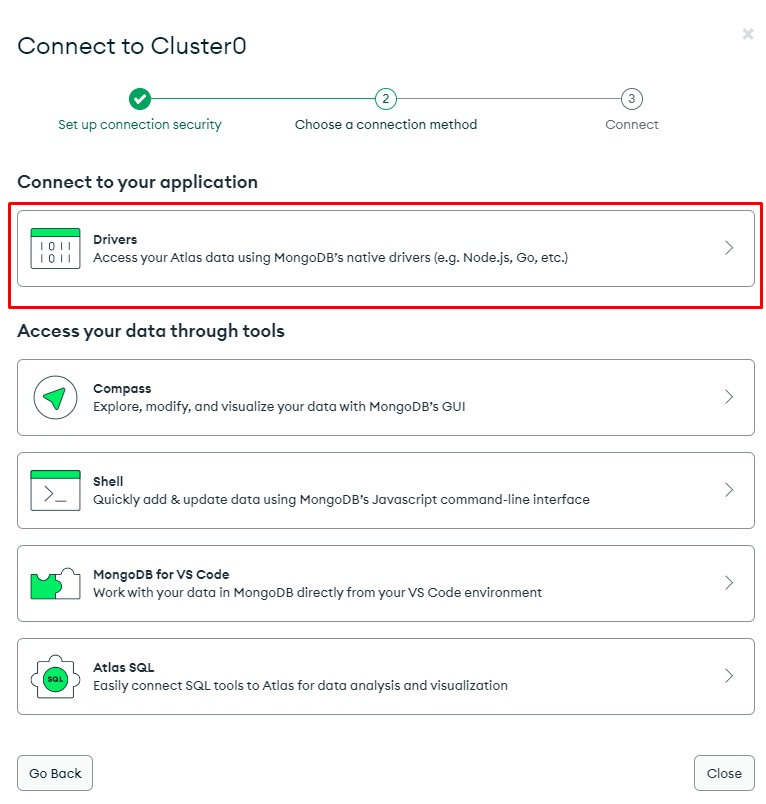
Choose Drivers and then in the next screen you will have your connection string ready as shown in the following image
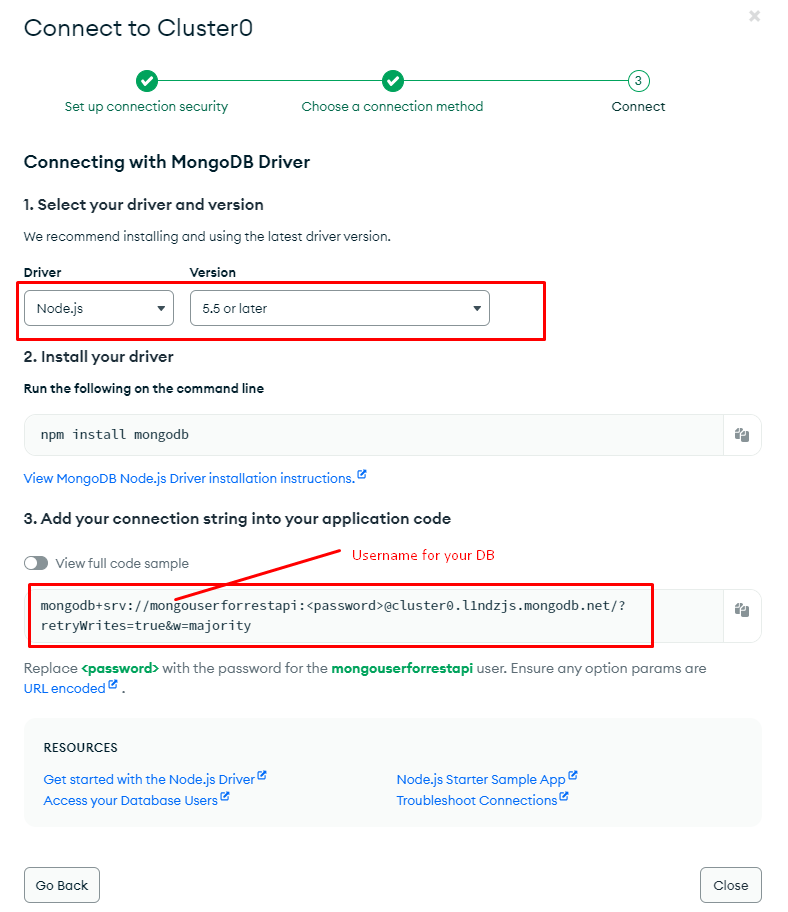
At the second step we have completed one small survey where we have chosen JavaScript as the preferred language. So Atlas already selected the Node.js Driver for us automatically. If we have chosen something different in that Language dropdown you would have seen a different Driver in this screen
Step-7 Create first Database or Collection
In this step we are going to create our first database and collection. The screens for creating the database would be as follows
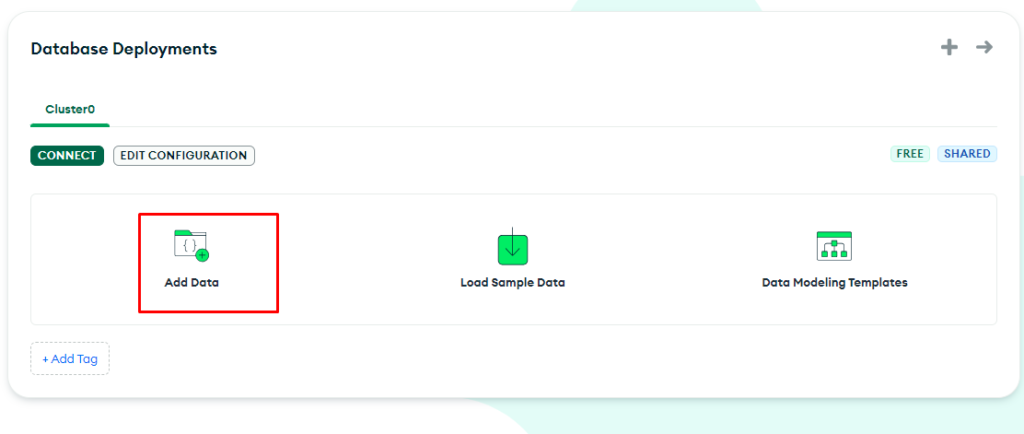
Choose ‘Add data’ then
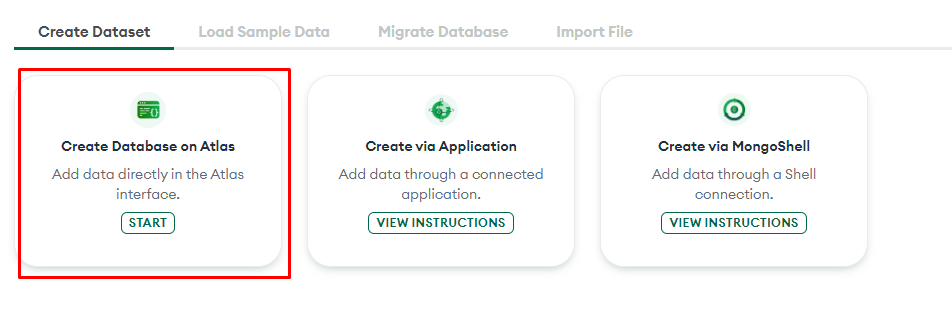
Select ‘Create Database in Atlas’
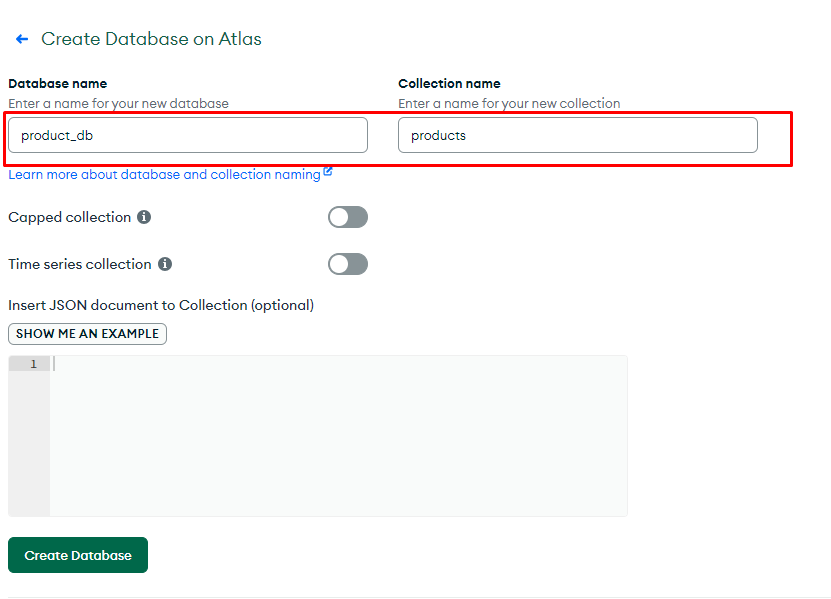
Fill in the Database name , collection name and then click on ‘Create Database’ to complete the database setup
Monitoring and Management
To monitor the performance and alerts you can do the following from the dashboard
- Monitor Performance: Use the “Metrics” tab to see detailed statistics.
- Set Alerts: Go to the “Alerts” section to configure alerts for different conditions.
- View Backups: In the “Backups” tab, you can see automated backups, restore data, or download backups.
MongoDB Atlas provides a seamless experience for managing MongoDB instances. By following this guide, you should now have your MongoDB Atlas cluster set up and integrated into your application. Remember to keep an eye on performance, regularly review your security settings, and ensure your data is backed up as your application scales. Happy Coding!!

