

In the dynamic landscape of web development, handling file uploads is a common requirement for many applications. Whether it’s uploading images, videos, documents, or any other file type, Node.js provides powerful tools to accomplish this task efficiently. One such tool is Multer, a middleware for handling multipart/form-data, which is primarily used for uploading files.
In this article we are going to build a REST API to upload files using Multer
Project Setup
Let’s create folder and name it as ‘MulterUpload’ . Now open the folder using your favorite editor lets say VS Code and issue the following command from console
npm init -yThe above command will create a package.json file inside the folder. Now lets install the required packages
npm install express multerThis will install express framework and multer middleware
Now let’s create a file app.js and write the following code
const express = require('express');
const app = express();
const port = 8000

app.listen(port, ()=> console.log(`Server started at port ${port}`));
Now as you can see we have set up a basic express server listening to port 4000. Now let’s create three folders so that our project is structured in a professional way. The folders are ‘controllers’, ‘routes’ and ‘uploads’ as shown in below picture

The ‘uploads’ folder will store all the uploaded files . With this our application skeleton is now ready and we can move to see different ‘multer’ functionality for uploading files
Uploading a Single file
lets create a file inside our controllers folder and name it as ‘upload.controller.js’. We will create a function to receive the request for upload inside this function and provide the response for a successful upload
function uploadFile(req,res){
    try{

        if(req.files.length === 0){
            throw new Error(`Missing files`)
        }
        return res.status(200).json({
            message:"File Uploaded Successfully"
        })
    }catch(err){
       return res.status(500).json({
            message:"Something went wrong",
            error: err.message
        })
    }
}

module.exports = {
    uploadFile
}
In the above file we are checking that whether we have sent any file for upload if not throw an error else for successful upload return a success message.
Next in the routes folder create a file ‘uploads.js’ and inside this file put the following code
const {uploadFile} = require('../controllers/upload.controller');
const multer = require('multer');
const router = require('express').Router();

const fileUpload = multer({dest:"uploads/"})

router.post('/upload',fileUpload.single('fileName'),uploadFile);

module.exports= router
In the above code we have brought in multer and then configured multer with the destination folder ‘uploads’ which we have created earlier. Then we have passed fileUpload.single(‘fileName’) as a middleware to the route . Here ‘single’ implies only a single file can be uploaded and the field through which file to be sent is ‘fileName’ .
Now we need to include this route into our app.js so that we can test the app from postman. So the updated code for app.js is shown below
const express = require('express');
const uploadRoute = require('./routes/upload');

const app = express();

app.use(express.json())
app.use('/api',uploadRoute);

const port = 8000

app.listen(port,()=>console.log(`Server started at ${port}`));
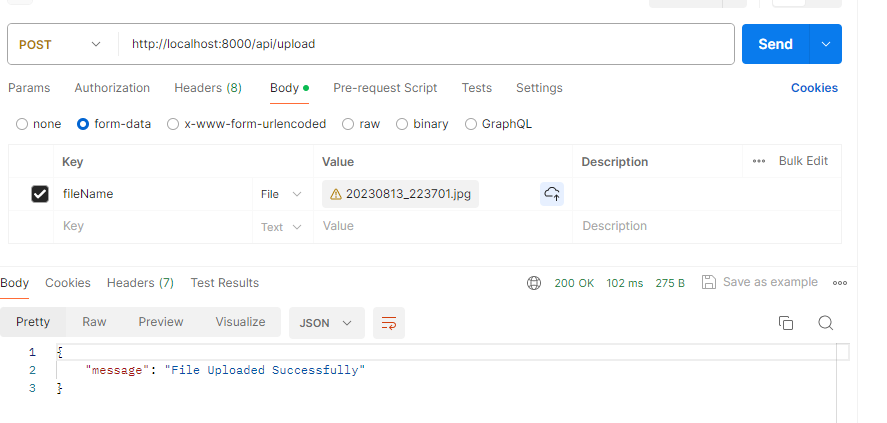
Now we can test it in postman
Uploading Multiple Files
To upload multiple file we are going to create a new endpoint in the ‘uploads.js’ file and add some new code so that we can achieve our desired goal for uploading multiple files. So let’s do it
const {uploadFile} = require('../controllers/upload.controller');
const multer = require('multer');
const router = require('express').Router();

const fileUpload = multer({dest:"uploads/"});

router.post('/upload',fileUpload.single("fileName"),uploadFile);
router.post('/uploadmulti',fileUpload.array("fileName",2), uploadFile);

module.exports= router
As you can see w have added another endpoint for uploading multiple files ‘ /uploadmulti’ and in this end point we have passed fileUpload.array(“fileName”,2) . The first parameter signifies the field name through which the files needed to be uploaded and second parameter signifies maximum number of files that can be uploaded and in this case it is 2.
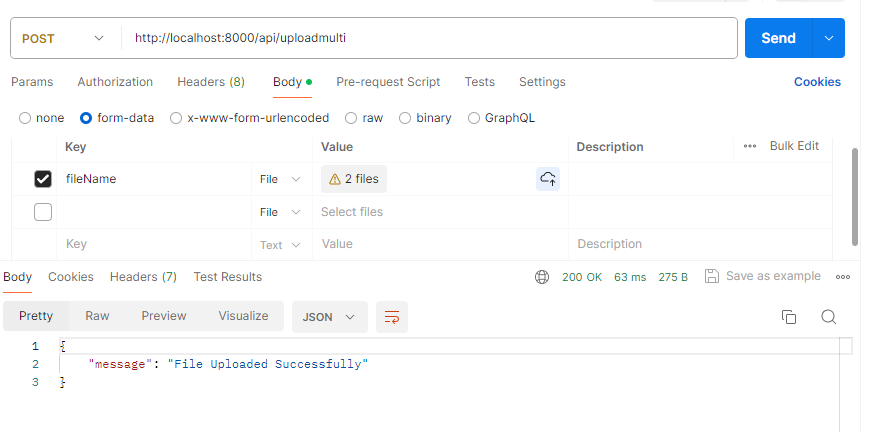
Let’s test multiple file upload in postman

Now there can be scenarios where you are uploading multiple files but field names are different e.g. we want to upload the profile photo and resumes through a single api end point . So how do we achieve that , the solution is very simple. Lets look at the code below
const {uploadFile} = require('../controllers/upload.controller');
const multer = require('multer');
const router = require('express').Router();

const fileUpload = multer({dest:"uploads/"});

const multiFileUpload = fileUpload.fields([
    {name:'profileImage',maxCount:1},
    {name: 'resume',maxCount:1 }
])
//const upload = multer({ storage , fileFilter, limits: {fileSize: 100000000, files: 2}});
router.post('/upload',fileUpload.single("fileName"),uploadFile);
router.post('/uploadmulti',multiFileUpload, uploadFile);

module.exports= router
Here as you can see in the above code the code block
const multiFileUpload = fileUpload.fields([
    {name:'profileImage',maxCount:1},
    {name: 'resume',maxCount:1 }
])
This particular block of code is responsible for accepting file uploads through different field names. The ‘fileUpload.fileds’ takes an array as argument which contains multiple objects. Each object has two attributes ‘name’ which signifies the field name and ‘maxCount’ signifies maximum number of files that can be uploaded through this field. We have also passed ‘multiFileUpload’ as a middleware to our route.
Now lets test it using postman

Change or retain the name of the file that is getting uploaded
Once you upload a file using multer, you will see in the uploads folder that there are files which has different names than the file name that you have uploaded and those files are without any extension. Because multer itself encrypts the file and give a name to it but multer also gives you the ability to control the name of the files as we are going to in the below code
Let’s open ‘uploads.js’ and write the following code inside it
const {uploadFile} = require('../controllers/upload.controller');
const multer = require('multer');
const router = require('express').Router();


const storage = multer.diskStorage({
    destination: (req,file,cb)=>{
        cb(null,"uploads");
    },
    filename: (req,file,cb)=>{
        const {originalname} = file
        cb(null,`${Date.now()}-${originalname}`);
    },


})


const fileUpload =multer({storage})

router.post('/upload',fileUpload.single("fileName"),uploadFile);
router.post('/uploadmulti',fileUpload.array("fileName",2), uploadFile);

module.exports= router
In the above code we have changed the way previously multer was getting initialized and instead we have used multer’s ‘diskStorage’ to utilize the full capability of multer.
In the abvoe code an object is passed as a parameter to the ‘diskStorage’ function. The first attribute ‘destination’ is a method which takes three parameters req,res and cb(callback function) and inside the method we have passed the “uploads” folder as a second parameter to the callback. So once the api is called the multer middleware will execute ‘destination’ method and initialize the destination
Now to change the name of the file we have used ‘filename’ attribute of the ‘diskStorage’ object which is basically a method which will execute whenever a file will be uploaded. This method also takes three parameters req,res and cb(callback function) and we have passed our pattern for desired filename as a second parameter to the callback function as we did previously in case of destination. With each call to the API multer will change the file name before it gets stored to the destination
Let’s test our code in postman
and the resulting file name after we implemented the above code will look something like

Limiting the size of file
Most of the times when we upload the file we may need to restrict the size of the file. We can achieve this very easily with multer as shown below. We will make some changes in the ‘uploads.js’
const {uploadFile} = require('../controllers/upload.controller');
const multer = require('multer');
const router = require('express').Router();


const storage = multer.diskStorage({
    destination: (req,file,cb)=>{
        cb(null,"uploads");
    },
    filename: (req,file,cb)=>{
        const {originalname} = file
        cb(null,`${Date.now()}-${originalname}`);
    },


})


const fileUpload =multer({storage, limits:{fileSize:100000,files:2}})
router.post('/upload',fileUpload.single("fileName"),uploadFile);
router.post('/uploadmulti',fileUpload.array("fileName",2), uploadFile);

module.exports= router
As you can see in the above code we have added ‘limits’ which is basically an object which takes ‘fileSize’ that is the maximum size of the files that can be uploaded and ‘files’ that is maximum number of files . The ‘fileSize’ is always written in bytes
Restrict the type of files that can be uploaded
Another important aspect of file upload is the ability to restrict the type of files that can be uploaded. We can achieve this in multer using ‘fileFilter’ option. Let’s see how we can implement this in the following code.
const {uploadFile} = require('../controllers/upload.controller');
const multer = require('multer');
const router = require('express').Router();

const storage = multer.diskStorage({
    destination: (req,file,cb)=>{
        cb(null,"uploads");
    },
    filename: (req,file,cb)=>{
        const {originalname} = file
        cb(null,`${Date.now()}-${originalname}`);
    },


})

const fileFilter= (req,file,cb)=>{
    if(file.mimetype.split('/')[0] === 'image'){
        cb(null,true)
    }else{
        cb(null,false)
    }
}


const fileUpload =multer({storage, fileFilter, limits:{fileSize:100000,files:2}})
router.post('/upload',fileUpload.single("fileName"),uploadFile);
router.post('/uploadmulti',fileUpload.array("fileName",2), uploadFile);

module.exports= router
In the above code as you can see the the ‘fileFilter’ is a function which takes three parameters req,res and cb(callback function) . In the above example we are trying to prevent the upload of all types of files except image files. ‘file.mimettpe’ provides the type of the file that has been uploaded. Then we are passing this fileFilter as an option to multer to prevent the unexpected file types being uploaded.
Last but not the list how we can handle errors of file upload. So in the last and final section we are going to look at the handling of errors
Error Handling
Generally we handle errors in controller and send them in response but handling errors in generated by multer is not easy to handle in controllers as multer is a middleware. So we can use another middleware to delegate the error to express in a proper way. Let’s write some code in order to have a better idea. In the ‘app.js’ just after where we have called the route for upload just below that we will write the following code to handle error about limiting file size
const express = require('express');
const uploadRoute = require('./routes/upload');
const { MulterError } = require('multer');


const app = express();

app.use(express.json())
app.use('/api',uploadRoute);
app.use((error,req,res,next)=>{
    if(error instanceof MulterError){
        return res.status(400).json({
            message: error.message
        })
    }
})
const port = 8000

app.listen(port,()=>console.log(`Server started at ${port}`));
Here as you can see we have created another middleware and passed a function to it just after the upload router in ‘app.js’. We have brought in ‘MulterError’ from multer and then checking whether an error generated is an instance of MulterError . If yes we are throwing responding with the specific error message.
Multer is a powerful middleware for handling file uploads in Node.js applications. It simplifies the process of handling multipart/form-data and provides various options for customization. By following the guidelines outlined in this article, you can effectively integrate Multer into your Node.js projects and handle file uploads with ease.
To know more about different options in multer and read in more detail please use the documentation of express multer middleware