

React, with its component-based architecture and virtual DOM, has revolutionized web development. But building a complex web application with React often requires navigating between different views or pages. This is where routing comes into play. Routing in React allows developers to manage the navigation of the application by defining the mapping between URLs and the corresponding UI components. In this guide, we’ll delve deep into routing in React, exploring various concepts, techniques, and popular libraries to master this essential aspect of modern web development.
How to create routing in React ?
Routing in React involves mapping different URLs to specific components that should be rendered when the user navigates to those URLs. This enables the creation of single-page applications (SPAs) where the page content changes dynamically without requiring a full page reload. React library doesn’t provide any means for routing. In order to use the routing features we need to use third party libraries . There are lots of libraries available for routing but most popular among them is ‘react-router-dom’ . In this guide we are going to make use of this library to see different routing concepts . In this tutorial we are also going to show you different approaches for routing . We will start with the basic and easy approach
Step-1
Create a react application.
npx create-react-app react-routing-examplesAs shown in the above command I have given the application name as react-routing-examples you can choose whatever name you want.
Step-2
Next open the application on your favorite editor(like VSCode) and then install the ‘react-router-dom’ package.
npm install react-router-domStep-3
Let’s create a folder inside ‘src’ folder and name it as ‘components’ inside this folder we are going to create some components for pages , header and footer and layouts for those pages. So let’s get started. First lets create the pages as below
Home(Home.jsx)
export default function Home(){
    return(
        <div className="width100 text-center">

            <h1>Home Page</h1>
        </div>
    )
}About(About.jsx)
export default function About(){
    return(
        <div className="width100 text-center">

            <h1>About Page</h1>
        </div>
    )
}Products(Products.jsx)
export default function Products(){
    return(
        <div className="width100 text-center">

            <h1>Products Page</h1>
        </div>
    )
}
Next we are going to create our Header and Footer
Header(Header.jsx)
import { Link, Routes, Route } from 'react-router-dom';
import Home from './Home';
import About from './About';
import Products from './Products';

export default function Header(){
    return(
        <div className="width100">


            <Link to="/">Home</Link>  |
            <Link to="/about">About</Link>  |
            <Link to="/products">Products</Link>

            <Routes path="/">
                    <Route index element={<Home/>}></Route>
                    <Route path='about' element={<About/>}></Route>
                    <Route path='products' element={<Products/>}></Route>

            </Routes>
        </div>
    )
}
In the Header we have imported Link , Routes, Route from ‘react-router-dom’ and created the links for the pages and created different routes for Home, About and Products pages.
Footer(Footer.jsx)
export default function Footer(){
    return(
        <div className="width100 text-center">
            <hr/>
            <h3>Footer</h3>
        </div>
    )
}
Finally we are going to create our final component Layout which will dictate the structure of the each page
import { Outlet } from 'react-router-dom';
import Header from './Header';
import Footer from './Footer';

export default function Layout(){
    return(
        <>
            <Header/>

            <Outlet></Outlet>

            <Footer/>
        </>
    )
}
Here as you can see in the code that we have imported Outlet from ‘react-router-dom’ package and used <Outlet> between Header and Footer as because we wanted to render the content of each page in between header and footer which is a standard approach for any website.
Now we have final two steps left before we can test our application
Step-4
Let’s remove all the content from App.js and replace by the following code
import './App.css';
import Layout from './components/Layout';
function App() {
return (
<div className='width100 text-center'>
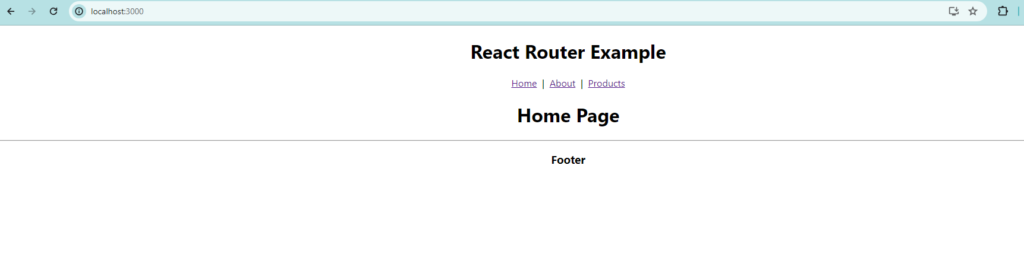
<h1>React Router Example</h1>
<Layout/>
</div>
);
}
export default App;
As you can see we have included the Layout component here in App.js so that it can render all the pages. There is only one step left and that is most important step and without this the routing won’t work
Step-5
Finally we need to make some change in the index.js file in order for the routing to work. The new index.js should look like this
import React from 'react';
import ReactDOM from 'react-dom/client';
import './index.css';
import App from './App';
import reportWebVitals from './reportWebVitals';
import { BrowserRouter } from 'react-router-dom';
const root = ReactDOM.createRoot(document.getElementById('root'));
root.render(
  <BrowserRouter>
    <React.StrictMode>
      <App />
    </React.StrictMode>
    </BrowserRouter>
);

// If you want to start measuring performance in your app, pass a function
// to log results (for example: reportWebVitals(console.log))
// or send to an analytics endpoint. Learn more: https://bit.ly/CRA-vitals
reportWebVitals();
We have made a small change here. We have imported ‘BrowserRouter’ from ‘react-router-dom’ and wrapped the entire render code with <BrowserRouter> as shown in the above code. And that’s it. Now start the application and you should see the the app working as expected and routing works fine if you click on the links Home. About and Products they should redirect to the respective pages without page reload. Some snapshots are shown below
About Page

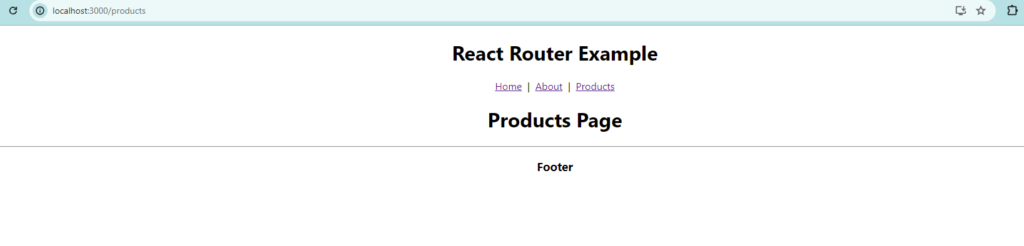
Products Page
Let’s discuss about some routing specific terms/tags that we have used in out code in order for the routing to work
<Routes> – It looks through all its child routes to find the best match and renders that branch of the UI.
<Route> – It indicates a specific route
<Link> – Equivalent to <a> tag serves as a link to a specific route
<Outlet> – An <Outlet> should be used in parent route elements to render their child route elements
<BrowserRouter> – A <BrowserRouter> stores the current location in the browser’s address bar using clean URLs and navigates using the browser’s built-in history stack.
Alternate Approach (Recommended by React Router Project)
In this approach we are going to make use of ‘createBrowserRouter’. This is the recommended way of ‘React router’ project of using router. We won’t change a lot of things but some files needs to be changed in order to accommodate the new approach. So we will go step by step and achieve our goal as we did with our first approach
Step -1
Create a file ‘routes.js’ under ‘src’ folder and add the following code to it
import { createBrowserRouter } from "react-router-dom";
import Home from "./components/Home";
import About from "./components/About";
import Products from "./components/Products";
import App from "./App";

export const routes = createBrowserRouter([
    {
        path:'/',
        element:<App/>,
        children:[
            {
                path:'',
                element:<Home/>,
            },
            {
                path:"about",
                element:<About/>
            },
            {
                path:"products",
                element:<Products/>
            }
        ]
    }
])
Here we have imported the ‘createBrowserRouter’ from ‘react-router-dom’ and created the routes. As the <Layout> is part of <App> so we will treat it as parent route and list the children routes (Home, About and Products) under it.
Step-2
Remove the <Routes> and <Route> tags from Header.jsx as shown below
import { Link} from 'react-router-dom';


export default function Header(){
    return(
        <div className="width100">


            <Link to="/">Home</Link>  |
            <Link to="/about">About</Link>  |
            <Link to="/products">Products</Link>


        </div>
    )
}
Step-3
The final and most important step is to bringing the <RouterProvider> and routes in index.js . The changed code of index.js will look as below
import React from 'react';
import ReactDOM from 'react-dom/client';
import './index.css';
import 'bootstrap/dist/css/bootstrap.min.css';
import 'bootstrap/dist/js/bootstrap.min.js';
import { RouterProvider } from "react-router-dom";
import { router } from './routes';
const root = ReactDOM.createRoot(document.getElementById('root'));
root.render(

  <RouterProvider router={router}/>

);
Now the code in index.js looks much simpler . The <RouterProvider> provides the router as the name suggested. We have passed in routes inside the RouterProvider in order our application to work properly
Before we finish we must understand there is not much difference between both the approaches. The only difference is that with the use of ‘createBrowserRouter’ you can make use of the React’s new Data APIs which you can’t do if you are using ‘BrowserRouter’ .
For more details about Routing in React you can also follow the official React Router documentation here
This is the end of Part-1 of this tutorial. In the next parts of this tutorial we are going to learn how to pass parameters in url, how to access those parameters , How to navigate programmatically from one page to another, how to lazy load routes and so on. Till then ‘Happy Coding’